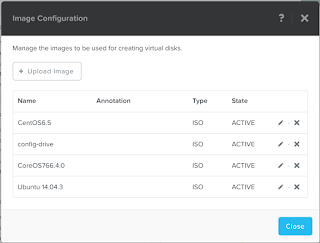
Part of scaling out any environment is having a
good template that can be spun up and incorporated easily into your imaging and
configuration management prep before it’s added to your platform of choice. For
Nutanix, I wanted to get these base templates ready and share what I needed to
do for Ubuntu/Debian, CentOS/RHEL, and CoreOS:
Ubuntu 14.04
1. Run any updates and add any packages you want
to be included in your baseline template with sudo apt-get. Keep in mind that
for most packages and configurations, you will want as minimal an image as
possible and add those components with Chef, Ansible, etc. Shared keys may be copied to an admin user's ~/.ssh directory to prepare for passwordless SSH.
2. Precreate DNS entries for VMs so that when
clones boot they pull hostname from DHCP.
3. Add a ‘hostname’
script under /etc/dhcp/dhclient-exit-hooks.d:
#!/bin/sh
# Filename:
/etc/dhcp/dhclient-exit-hooks.d/hostname
# Purpose: Used by
dhclient-script to set the hostname of the system
#
to match the DNS information for the host as provided by
#
DHCP.
#
# Do not update hostname for virtual machine IP
assignments
if [ "$interface" != "eth0" ]
&& [ "$interface" != "wlan0" ]
then
return
fi
if [ "$reason" != BOUND ] && [
"$reason" != RENEW ] \
&& [ "$reason" !=
REBIND ] && [ "$reason" != REBOOT ]
then
return
fi
echo dhclient-exit-hooks.d/hostname: Dynamic IP
address = $new_ip_address
hostname=$(host $new_ip_address | cut -d ' ' -f 5
| sed -r 's/((.*)[^\.])\.?/\1/g' )
echo $hostname > /etc/hostname
hostname $hostname
echo dhclient-exit-hooks.d/hostname: Dynamic
Hostname = $hostname
4. Make the ‘hostname’ script ready: chmod a+r hostname
5. Poweroff the VM that will become the template.
CentOS
6.5
1. Run any updates and add any packages you want
to be included in your baseline template with yum or the appropriate package
manager. Keep in mind that for most packages and configurations, you will want
as minimal an image as possible and add those components with Chef, Ansible,
etc. Shared keys may be copied to an admin user's ~/.ssh directory to prepare for passwordless SSH.
2. Precreate DNS entries for VMs so that when
clones boot they pull their hostname from DHCP.
3. Remove or delete the HWADDR line from the /etc/sysconfig/network-scripts/ifcfg-eth0 file.
3. Remove or delete the HWADDR line from the /etc/sysconfig/network-scripts/ifcfg-eth0 file.
4. Remove the mapped network device so that when
a new clone boots, it grabs a new MAC and is able to re-use eth0: rm /etc/udev/rules.d/70-persistent-net.rules
5. You can leave the hostname at
localhost.localdomain since the new hostname will be mapped on boot up from the
DNS record lookup.
6. Poweroff the VM that will become the template.
CoreOS
CoreOS is a special case as it deliberately is
“Just-enough-OS” to run containers. To
get into the really interesting work of CoreOS with Kubernetes and Tectonic,
you’ll need a cluster master(s) with more details around cluster architecture from CoreOS: https://coreos.com/os/docs/latest/cluster-architectures.html
For cloning mass amounts of nodes, you’ll want to create your own cluster member/worker/minion template that feeds into that master with a cloud-config file on a config-drive. Configuring an etcdmaster is here until I customize my own procedure.
For cloning mass amounts of nodes, you’ll want to create your own cluster member/worker/minion template that feeds into that master with a cloud-config file on a config-drive. Configuring an etcdmaster is here until I customize my own procedure.
1. Download the latest ISO from the stable, beta, or alpha release channel. You can also set this when you install to disk.
2. Make sure
you have one or more ssh key(s) generated on the host/desktop/laptop you would like to use
to connect to any of these worker nodes for individual configuration: ssh-keygen –t rsa –b 2048. Also, since you'll basically have a shared ssh key across the hosts at this point, Ansible can take advantage of this easily, more info from CoreOS here and from me here.
3. Create a
user_data text file according to directions here.
4. Create a
user_data text file with your favorite text editor. You’ll need a few changes
for an etcdmaster node, but here is an example cloud-config file from coreos here:
#cloud-config
ssh_authorized_keys:
-ssh-rsa
<copy the entirety of your id_rsa.pub file here>
coreos:
etcd2:
proxy:
on
initial-cluster:
etcdserver=http://<etcd-master-ip-here>:2380
listen-client-urls:
http://localhost:2379
fleet:
etcd_servers:
http://localhost:2379
metadata:
"role=etcd"
units:
-
name: etcd2.service
command:
start
-
name: fleet.service
command:
start
5. Convert
that text file into an iso according to the directions copied from here. Depending on your OS you may use mkisofs instead of hdiutil:
mkdir –p /tmp/new-drive/openstack/latest
cp user_data /tmp/new-drive/openstack/latest
hdiutil makehybrid -iso -joliet -default-volume-name config-2 -o configdrive.iso /tmp/new-drive rm –r /tmp/new-drive
8. When your
VM boots, it should auto-login as the ‘core’ user and you can run the install
to disk: sudo coreos-install –d /dev/sda
–C stable –c /media/configdrive/openstack/latest/user_data
9. Eject both ISO’s and power off the template: sudo
poweroff.
Mass Cloning in acli
Using either
the Acropolis CLI or REST API, you can set up the quick provisioning of a
massive number of clones, given the number of nodes at your disposal.
1. To clone the VMs using the Acropolis CLI, ssh into either the
cluster IP or a CVM IP as user Nutanix.
2. At the command line, enter ‘acli’ and feel free to customize the upper bound of VMs that you
can build on your Nutanix cluster (code modified from here https://vstorage.wordpress.com/2015/06/29/bulk-creating-vms-using-nutanix-acropolis-acli/):
for
n in {1..10}
do
vm.clone
vm$n clone_from_vm=basetemplate_name
vm.on
vm$n
done
3. If you want to script the operation, just preface the
vm.operation with acli, as in:
for
n in {1..10}
do
acli
vm.clone vm$n clone_from_vm=basetemplate_name
acli
vm.on vm$n
done
4. REST examples of cloning VMs via Acropolis on Github, https://github.com/nelsonad77/acropolis-api-examples courtesy of Manish Lohani @ Nutanix.
5.
Additional Links:


No comments:
Post a Comment